Thank you for choosing Cyclops! This article will guide you through the steps to use our platform. Get started at cyclops.dayta.ai now!
6 steps to get on board on Cyclops:
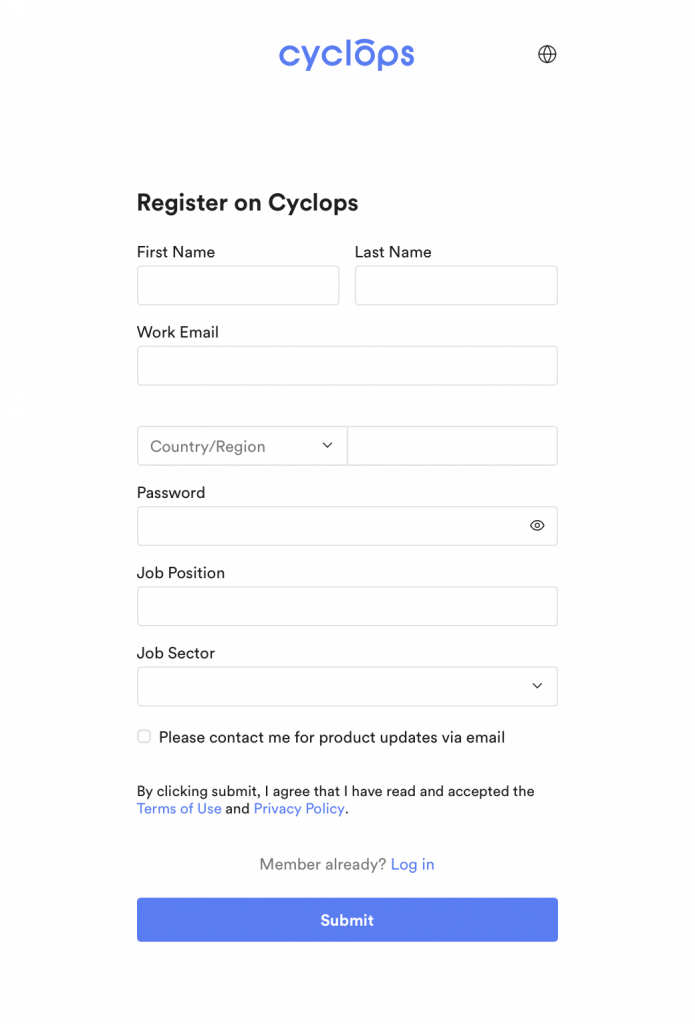
Step 1: Register an account
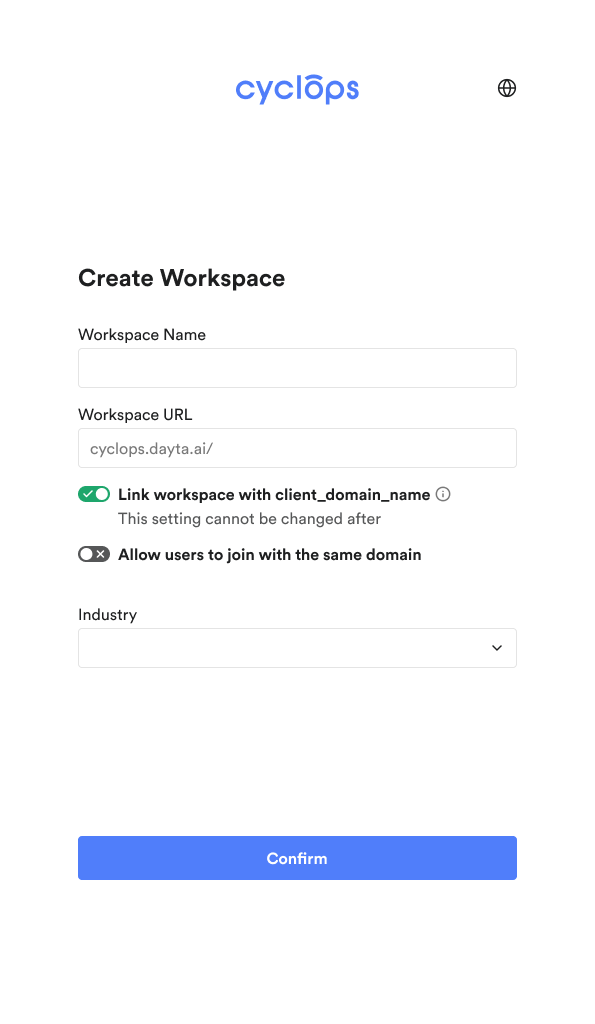
Step 2: Create / Join a Workspace

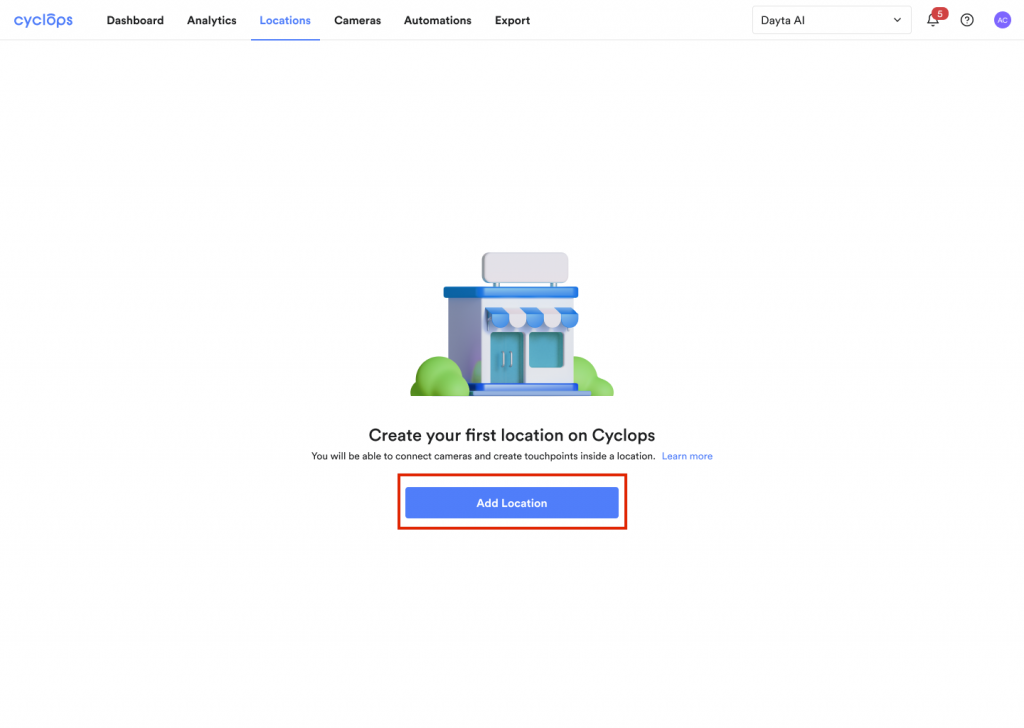
- Click “Locations” at the top navigation panel.
- Click the “Add Location” button.
You can easily follow along our instructions by inputting you location information, adjusting location access, and uploading your floor plan.
Step 4: Set up Cameras
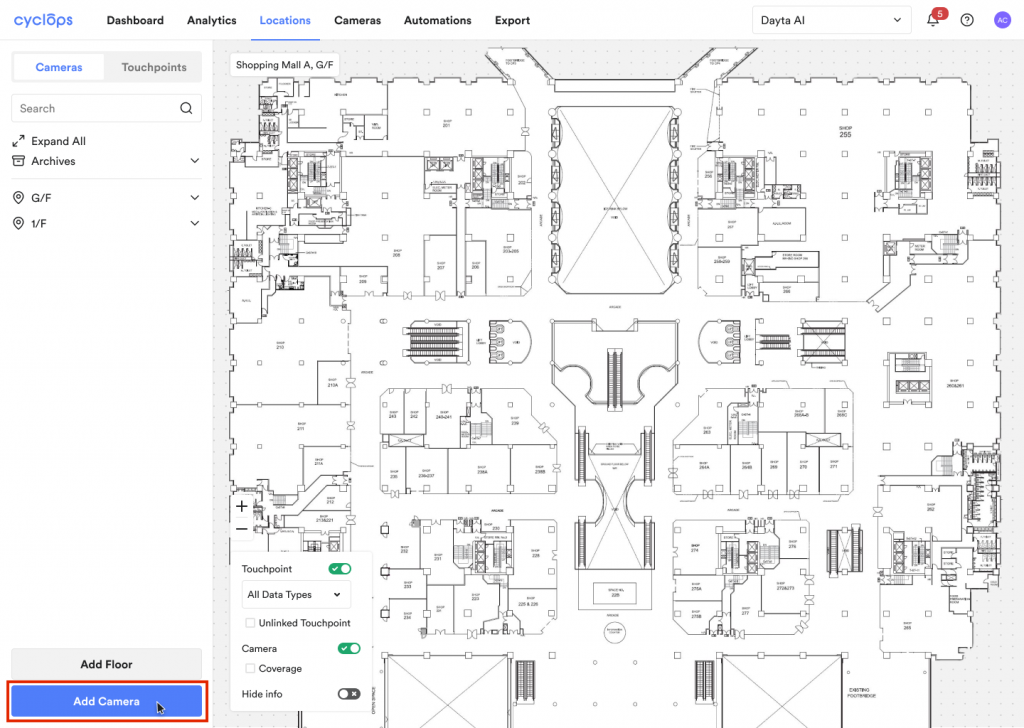
- In the Cameras panel, click “Add Camera” to start the set up
We will guide you through the settings, from inputting camera information and RTSP URL, to assign camera license, mark camera position, angle and coverage on the floor plan.
Step 5: Set Up Touchpoints
- In the Touchpoint panel, click “Add Touchpoint” to start the set up.
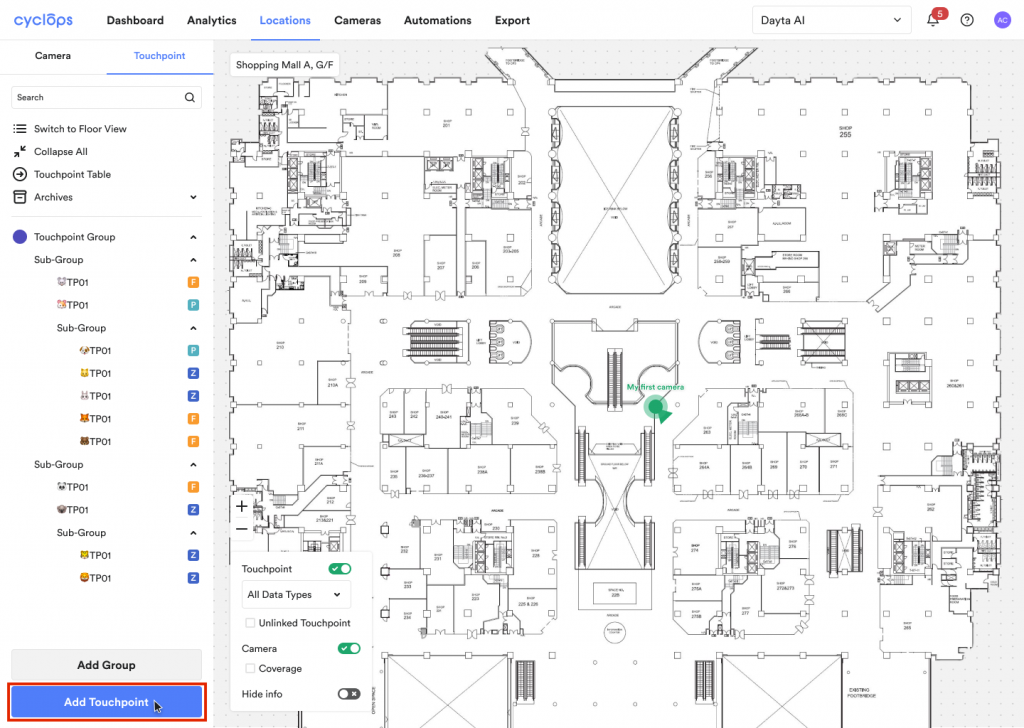
You will go through step-by-step setups, including inputting touchpoint information, marking touchpoint position on the floor plan and configuring the AI Engine.
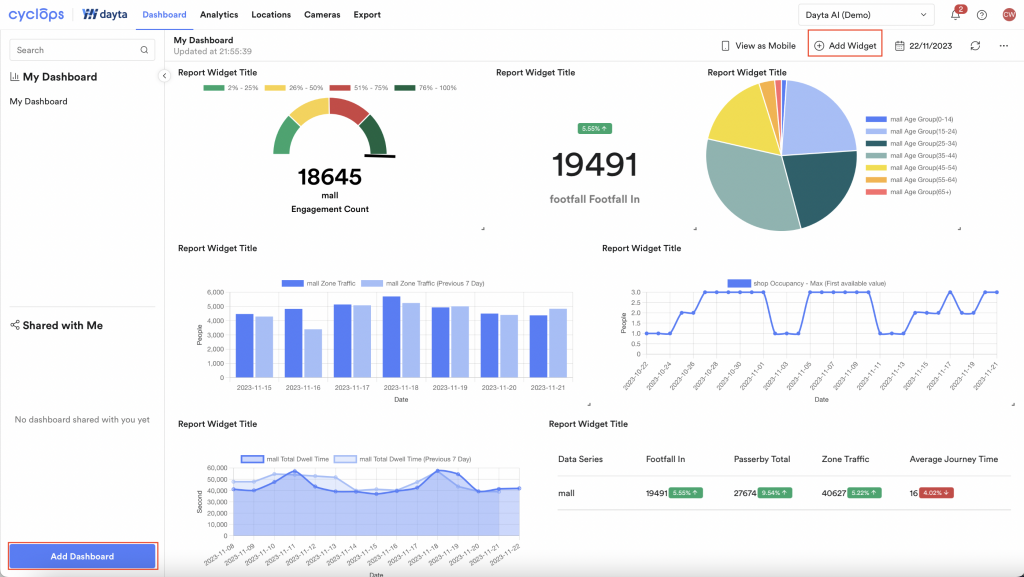
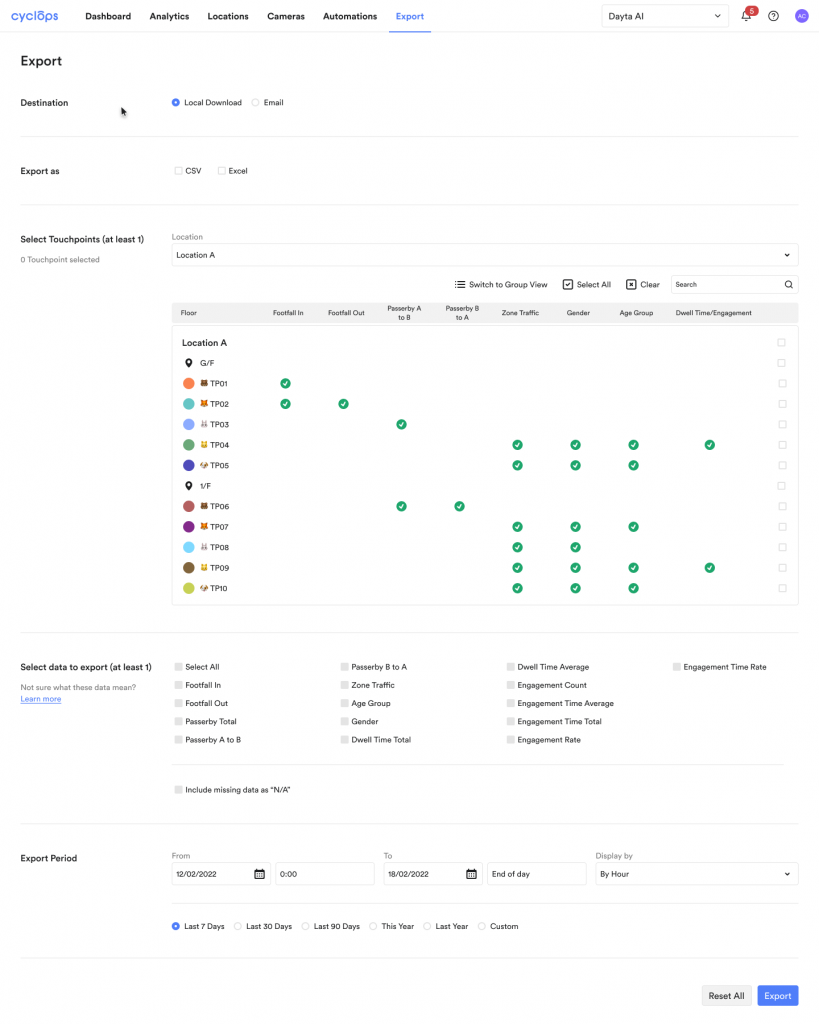
Step 6: View data on Cyclops
- You may create your dashboard and widgets to visualise data, or
- You may export your data in the “Export” tab.
Related Questions: