To further examine and consolidate your set of data, you may choose to export files from Cyclops in CSV or Excel format. There are two ways to export data: Local Download & Email:
Local Download: The exported files will be downloaded to your local computer
Email: The exported files will be sent to the recipient’s email address
Here we will walk you through the export process with each method.
Method 1: Local Download
Step 1: Make sure you have chosen Local Download

Step 2: Choose export file type: CSV and/or Excel

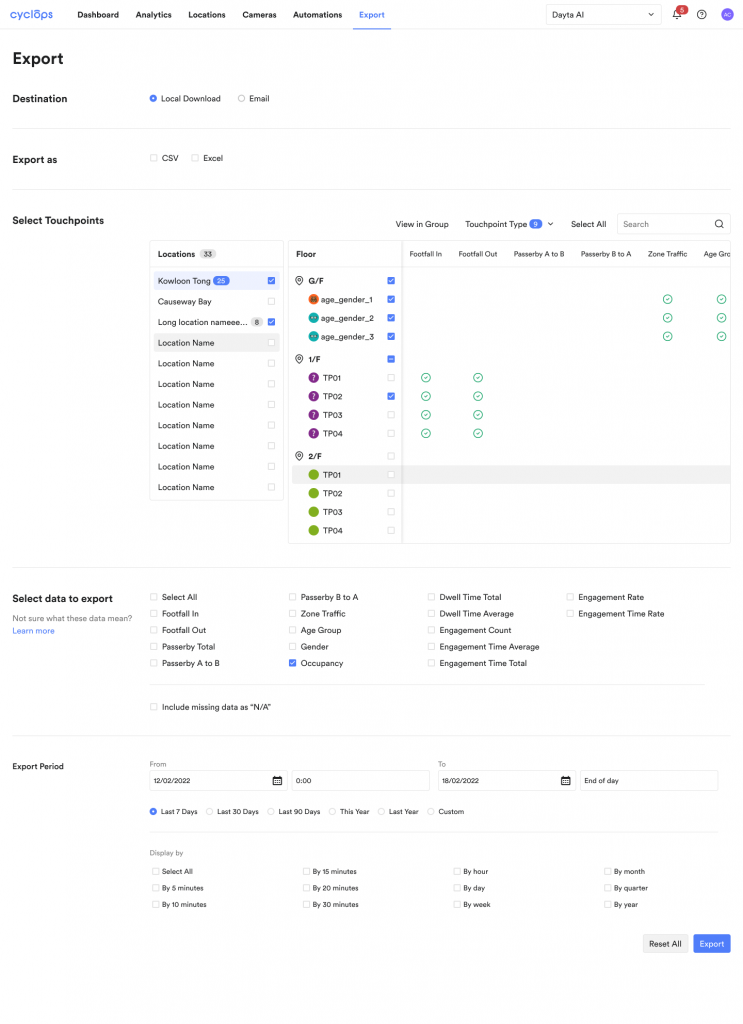
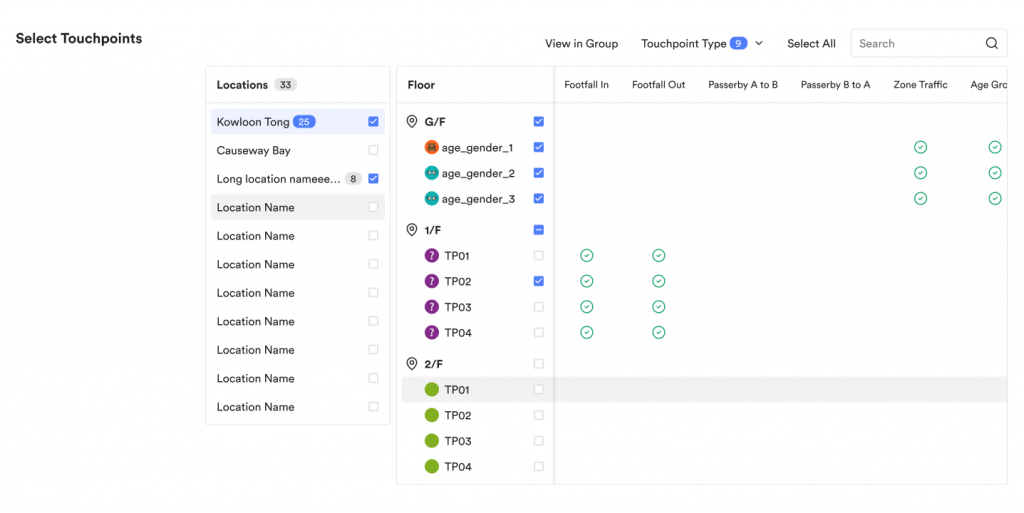
Step 3: Select suitable touchpoints as the source of data
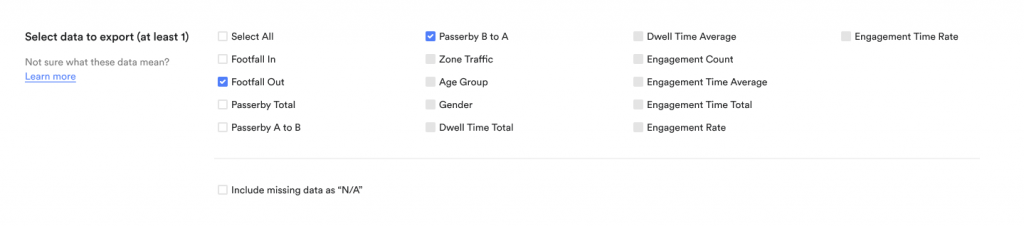
Step 4: Select the types of data you would like to export
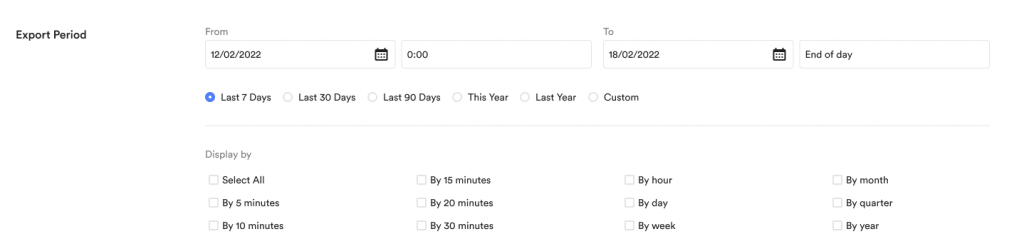
Step 5: Define the export period, including the data period and data display unit
Step 6: Submit your export request and wait
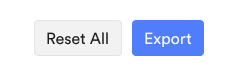
Everything should be set and ready to go, you can click Export to start exporting the data. The system will notify you if you miss something along the way.
It is also worth noting that the export processing time is directly related to the amount of data you are exporting, so please be patient if you are export a large amount of data.
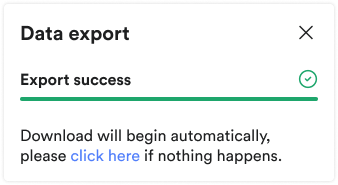
Step 7: Export Success!

at which offers great filtering and charting capability
Method 2: Email
Email export has a similar flow to Local Download, but has some extra fields to complete. Below are the steps to do so
Step 1: Make sure you have chosen Email

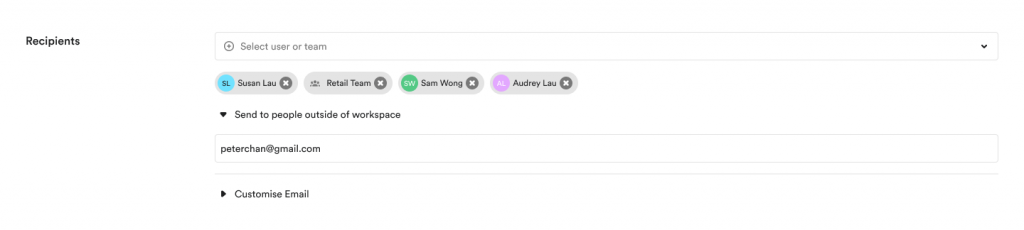
Step 2: Type the recipients’ email addresses
You may select workspace members as the recipients on the first dropdown bar, or type in email addresses outside of the workspace in the second bar.
Step 3: Customise your email (Optional)
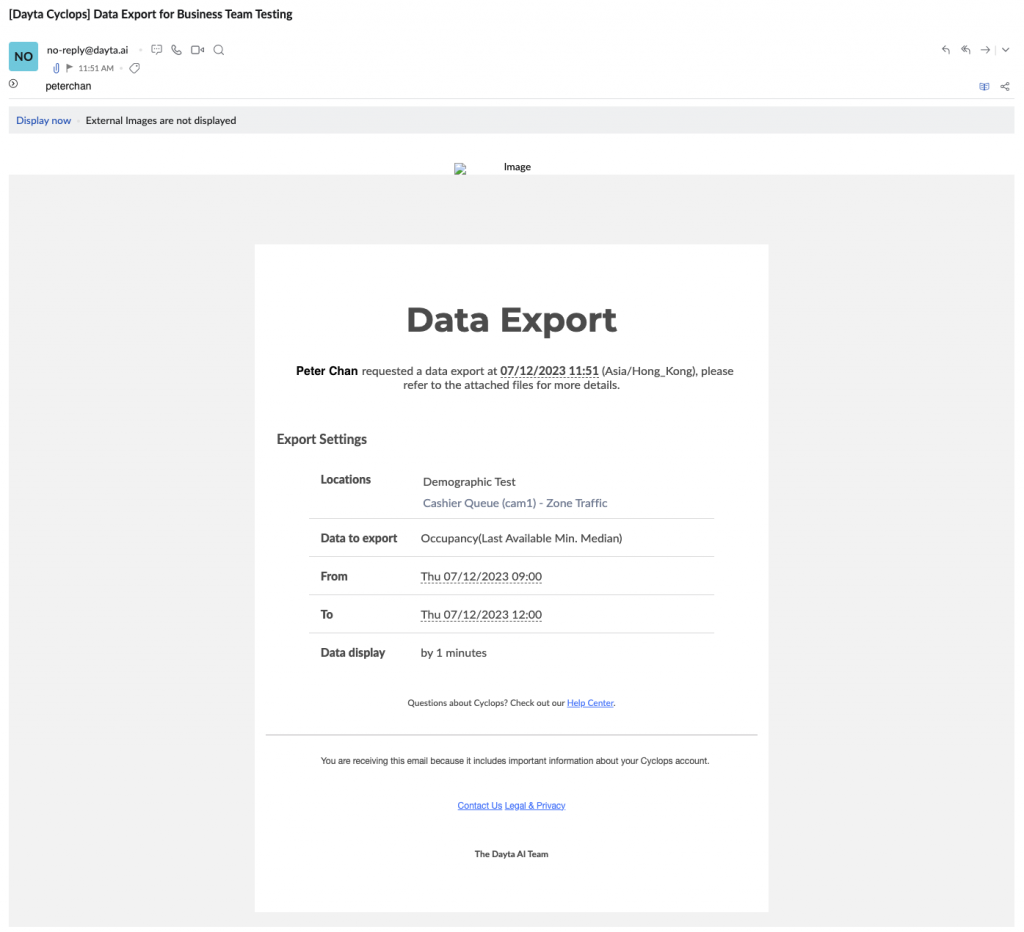
You may choose to customize the email title and body or leave them blank to use the default contents.

Step 4: Configure other export settings (introduced above)
Step 5: Click Export
Step 6: Export Success!

If you encounter any difficulties in exporting your data, please do not hesitate to report the problem by emailing us at support@dayta.ai.